
Key Takeaways:
- Selecting the right wood: Different wood types offer unique benefits for DIY floating shelves, from durability to aesthetic appeal.
- Building techniques: Proper construction methods, including the use of wood glue, screws, and pilot holes, ensure sturdy and long-lasting shelves.
- Finishing touches: Sanding, staining, and painting are crucial for achieving a polished and professional look.
Introduction
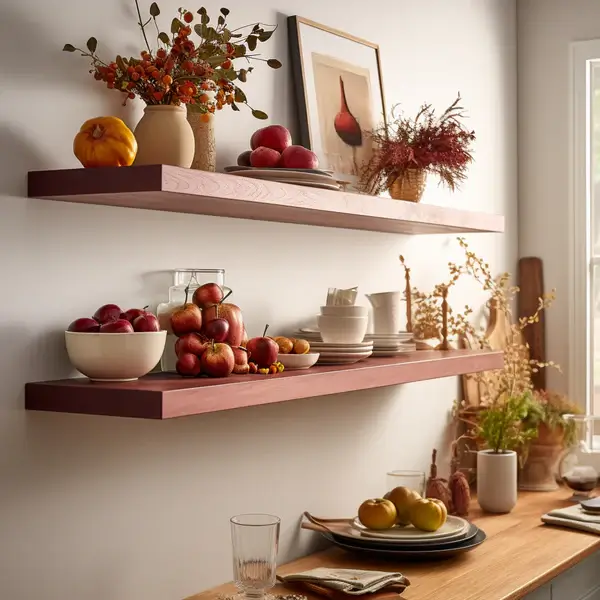
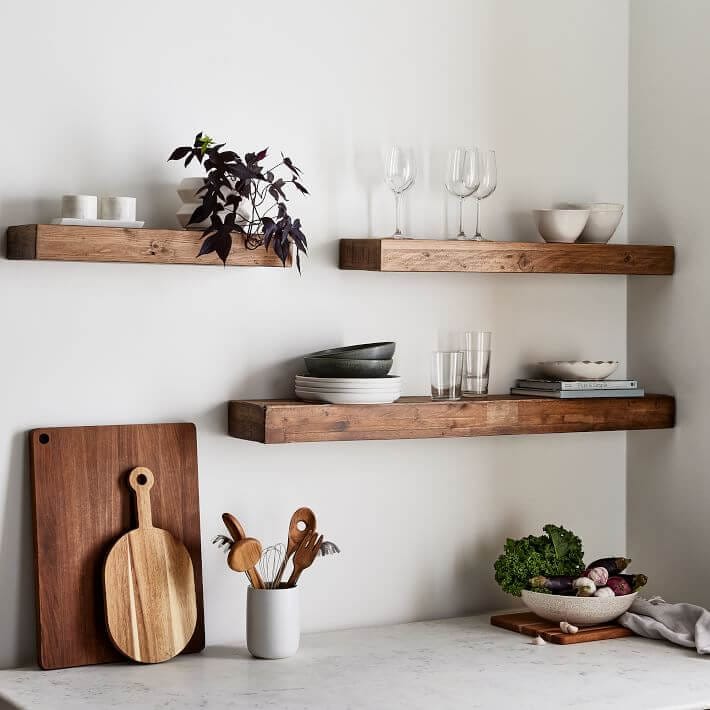
DIY floating shelves are a fantastic way to add both functionality and style to your home. Whether you're looking to display your favorite books, showcase decorative items, or simply add storage space, the right wood can make all the difference.
In this comprehensive guide, we'll explore the best wood types for DIY floating shelves, construction techniques, and finishing touches to ensure your project is a success.
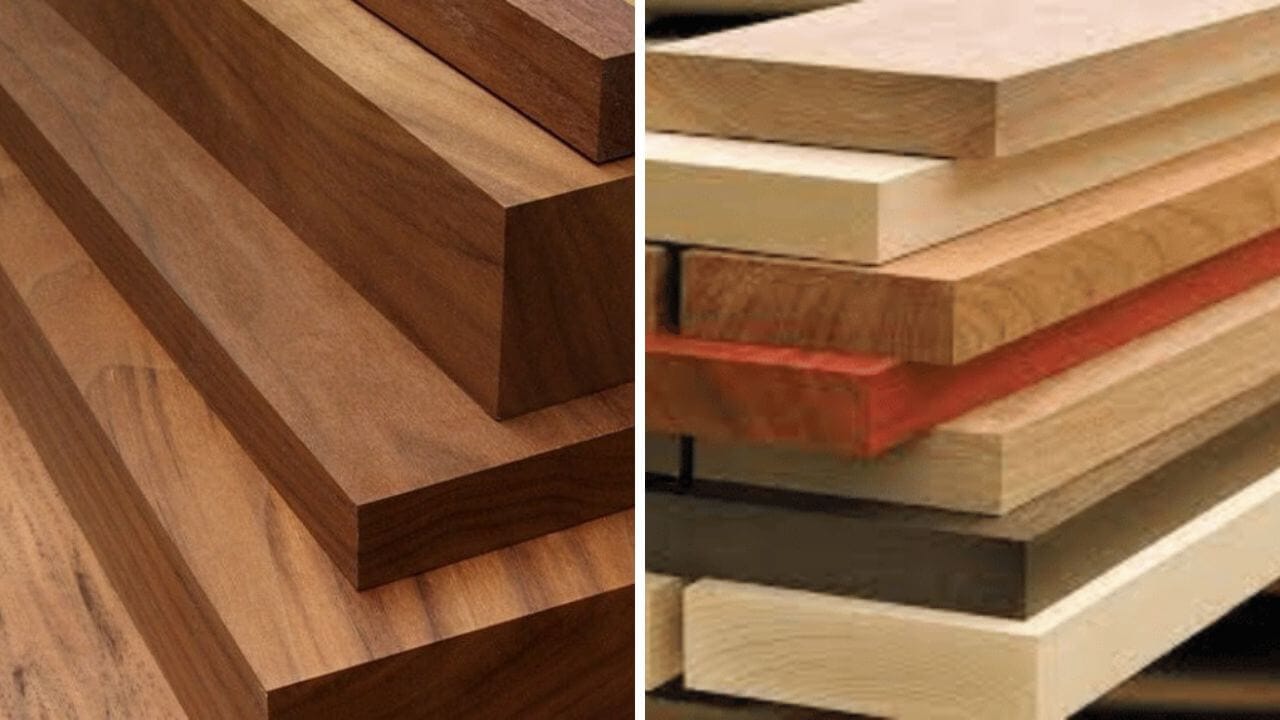
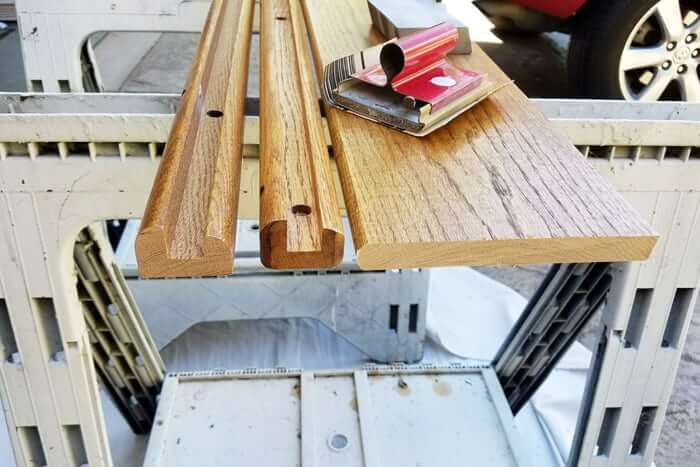
Choosing the Right Wood for DIY Floating Shelves
When deciding what wood to use for DIY floating shelves, it's essential to consider both aesthetics and functionality. Different wood types offer unique benefits, and your choice will depend on your specific needs and preferences, including how many shelves you'll be making.
Pine: A Cost-Effective Option
Pine is a popular choice for DIY floating shelves due to its affordability and availability. It's a softwood, making it easy to work with, especially for beginners. Pine shelving can be stained or painted to match your decor, offering versatility in design.
However, pine is not as durable as hardwoods, so it may not be the best choice for heavy-duty wooden shelves. If you're planning to store heavier items, you might want to consider a more robust wood type.

Oak: Durability and Classic Appeal
Oak is a hardwood known for its strength and durability, making it an excellent choice for floating shelves. It has a beautiful grain pattern that adds a classic touch to any room.
White oak, in particular, is highly resistant to moisture, making it suitable for areas like kitchens and bathrooms.
While oak is more expensive than pine, its durability and timeless appeal make it a worthwhile investment. If you're looking for a wood that can handle heavy loads and stand the test of time, oak is a top contender.
Maple: Smooth and Versatile
Maple is another hardwood that offers a smooth, even grain, making it ideal for a polished, finished look. It's a bit harder to work with than pine but provides a more durable and long-lasting floating shelf.
Maple can be stained to mimic more expensive woods like cherry or mahogany, offering a cost-effective alternative.
Maple's versatility makes it suitable for various applications, from minimalist modern designs to more traditional styles. If you're looking for a wood that offers both durability and aesthetic flexibility, maple is a great choice.
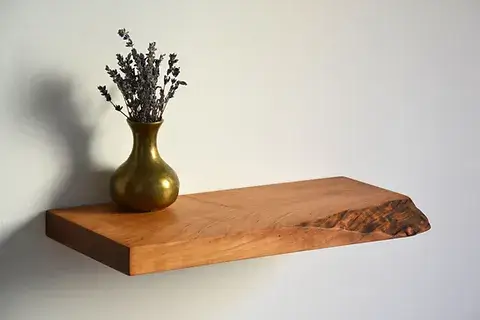
Walnut: Rich and Elegant
Walnut is a premium hardwood known for its rich, dark color and elegant grain pattern. It's a durable wood that can handle heavy loads, making it perfect for floating shelves that need to support weighty items. Walnut's natural beauty often means it doesn't require much finishing, allowing the wood's character to shine through.
While walnut is one of the more expensive options, its luxurious appearance and durability make it a favorite for high-end DIY projects. If you're aiming for a sophisticated, upscale look, walnut is an excellent choice.
Cherry: Warm and Inviting
Cherry wood is prized for its warm, reddish-brown color and smooth grain. It's a durable hardwood that darkens with age, adding character and depth to your floating shelves over time. Cherry is relatively easy to work with and finishes beautifully, making it a popular choice for DIY enthusiasts.
Though cherry is more expensive than some other options, its unique color and aging properties make it a worthwhile investment for those looking to add a touch of warmth and elegance to their home.
Mahogany: Luxurious and Durable
Mahogany is a high-end hardwood known for its rich, reddish-brown color and exceptional durability. It's a dense wood that can support heavy loads, making it ideal for floating shelves. Mahogany's natural beauty often means it requires minimal finishing, allowing the wood's luxurious appearance to take center stage.
While mahogany is one of the pricier options, its durability and timeless appeal make it a favorite for those looking to create a statement piece. If you're seeking a wood that combines luxury and strength, mahogany is an excellent choice.
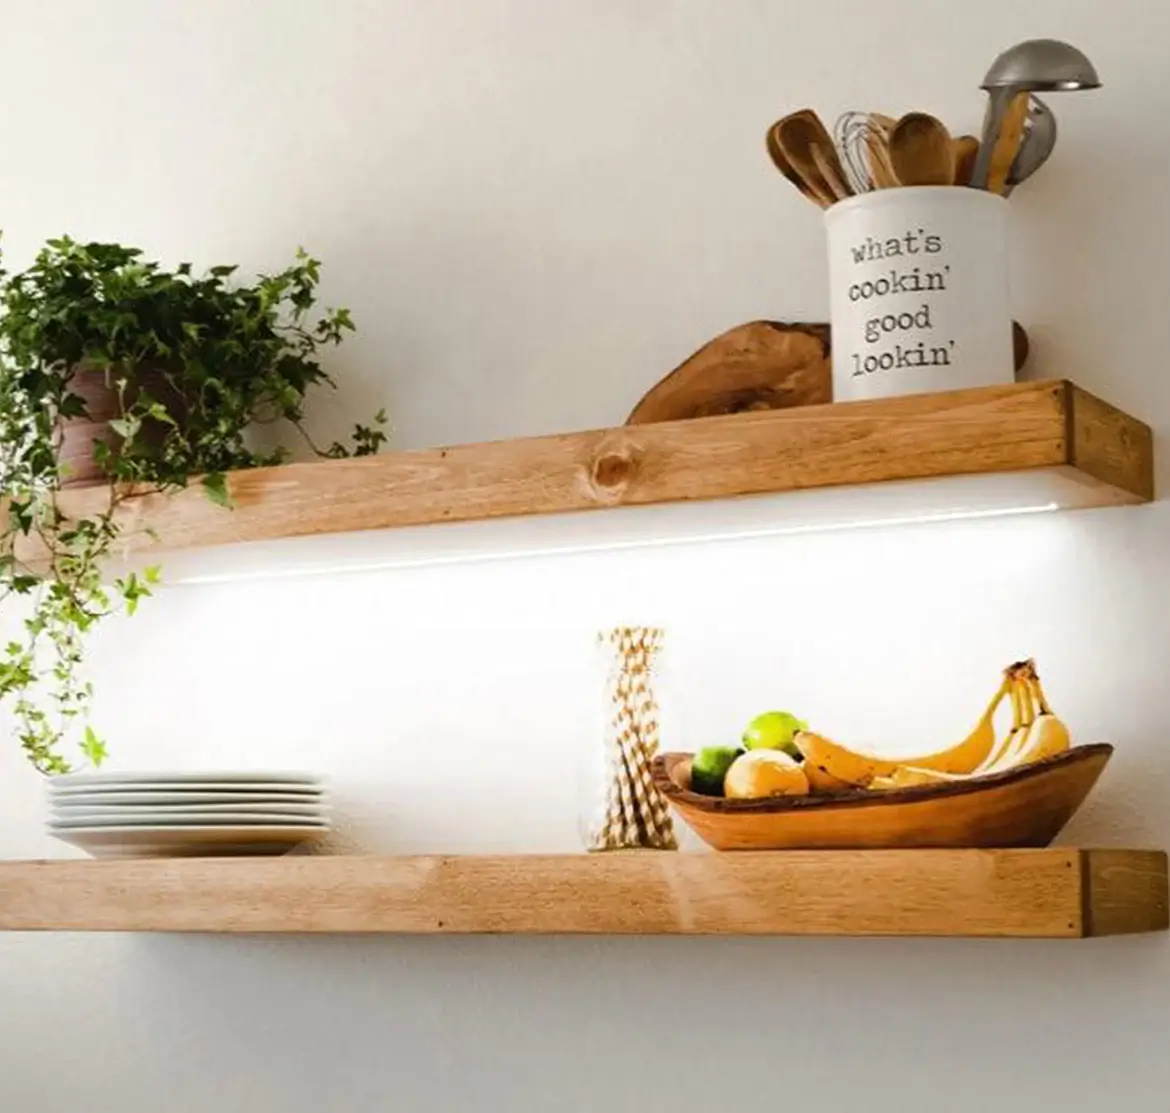
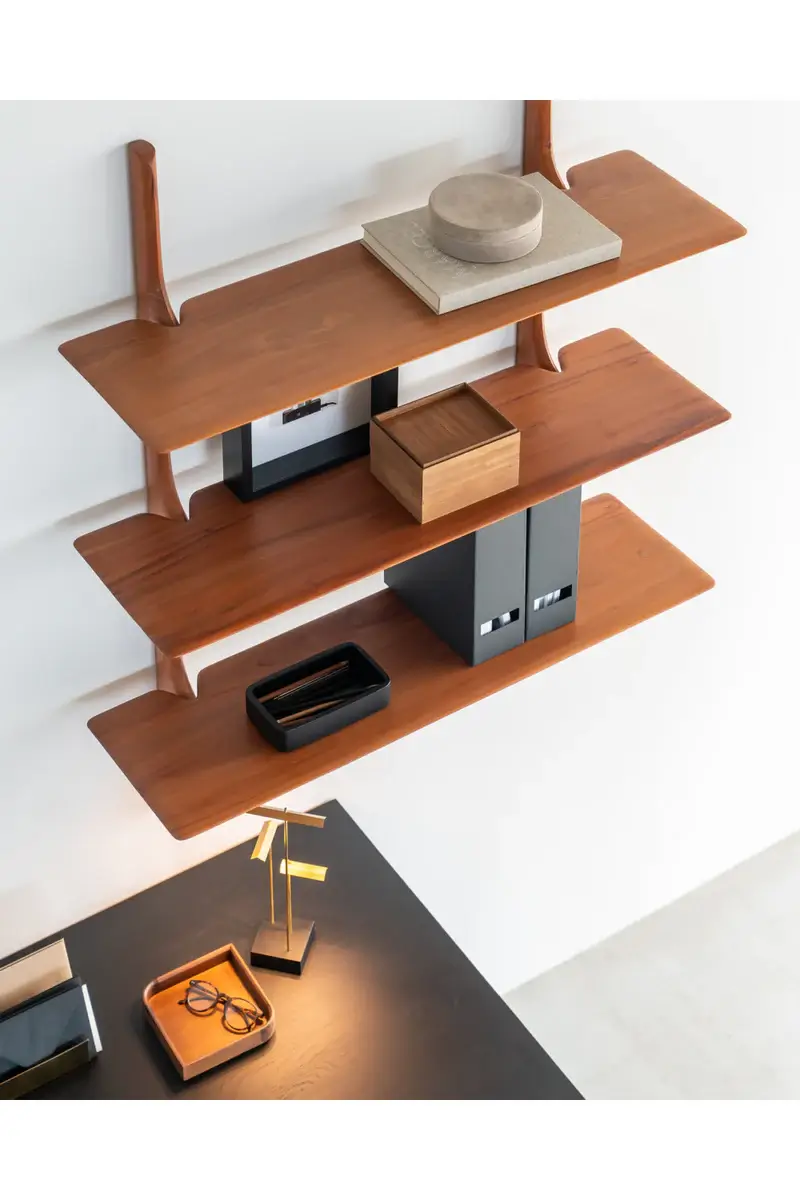
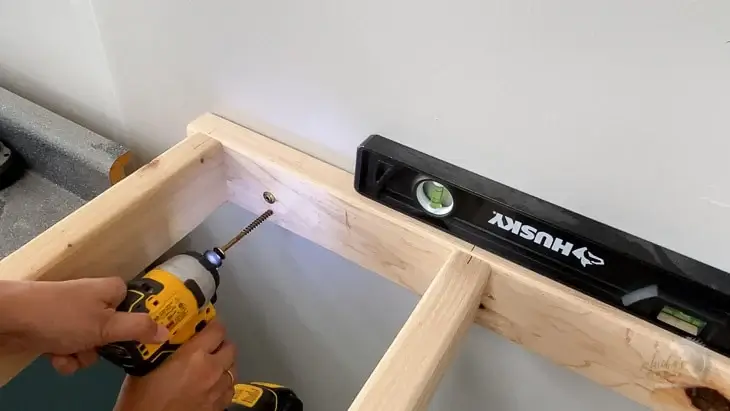
Building Techniques for Sturdy Floating Shelves
Once you've selected the ideal wood for your DIY floating shelves, the next step is to ensure they're built to last. Proper construction techniques are crucial for creating sturdy, reliable shelves that can support your items without sagging or falling.
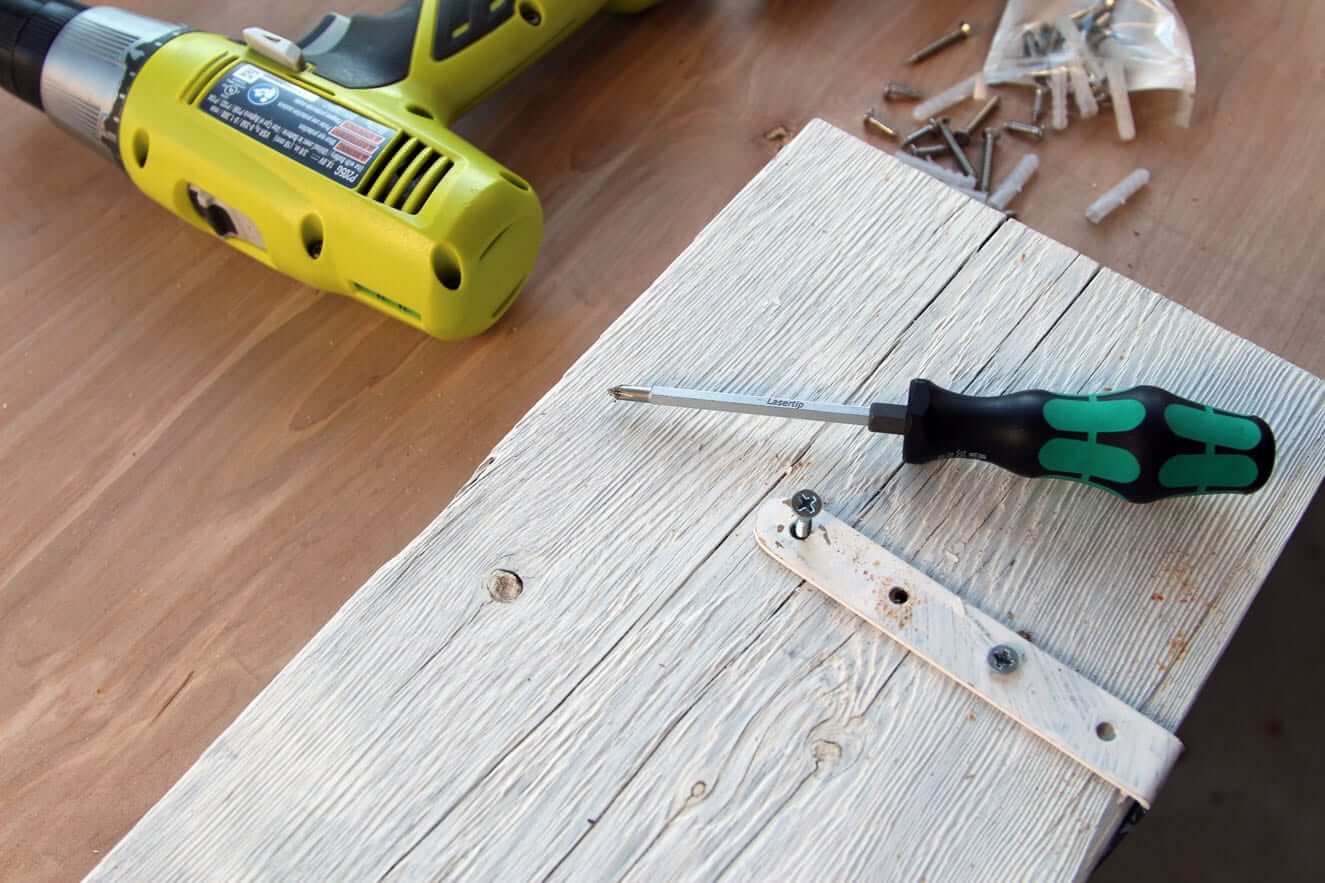
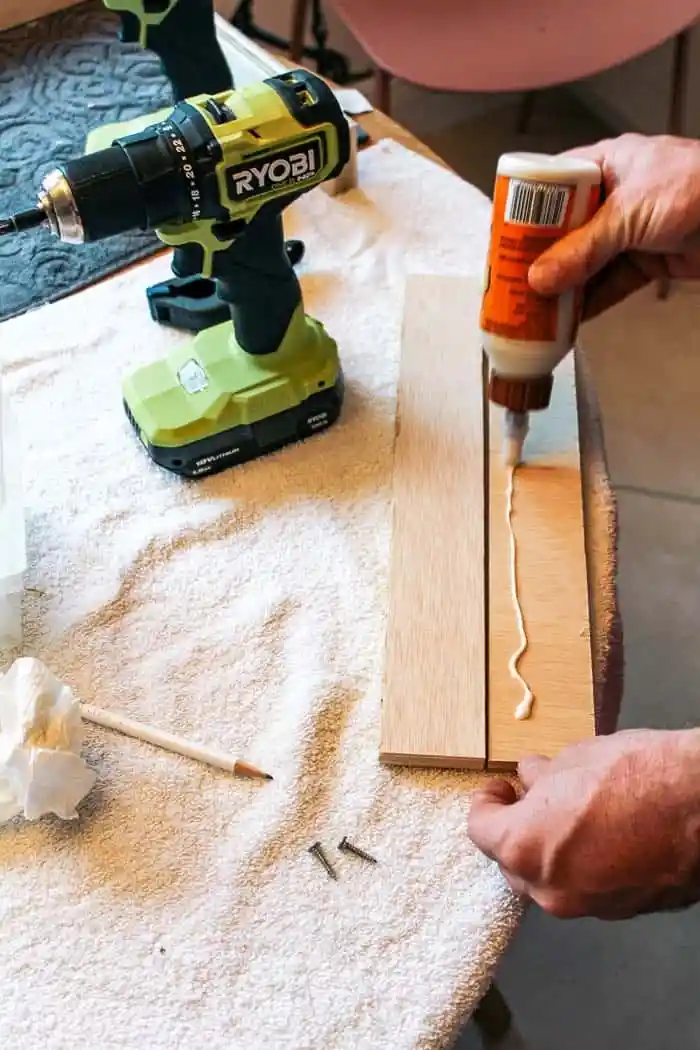
Using Wood Glue and Screws
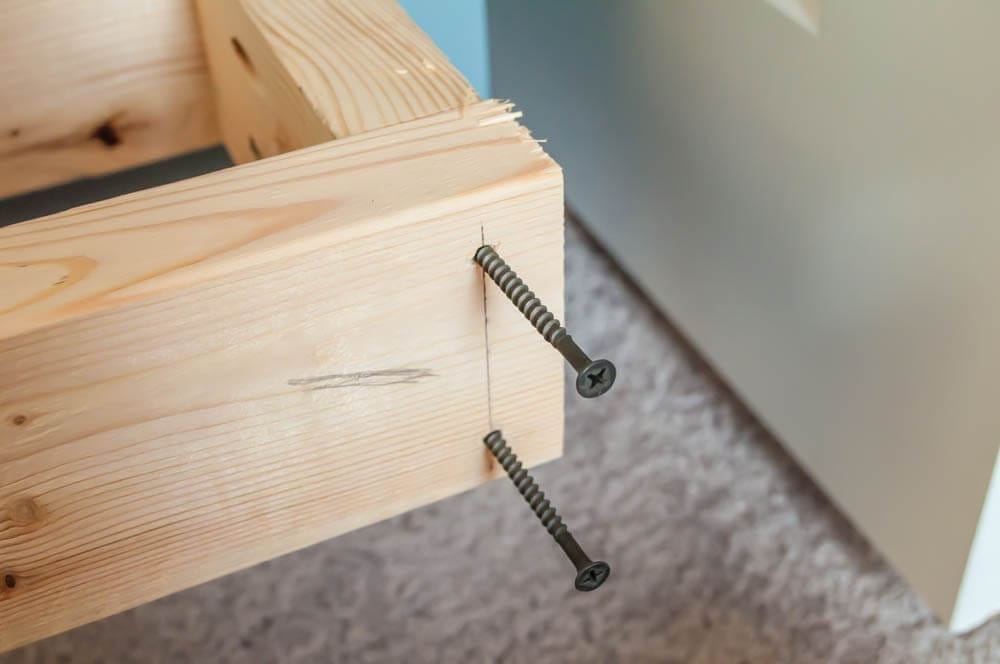
Wood glue and screws are essential for creating strong joints in your floating shelves. Apply wood glue to the edges of your boards before screwing them together to create a tight fit. This combination provides a robust bond that can withstand the weight of your items.
When attaching the shelves to the wall, use screws to secure the brackets or metal rods into the studs. This ensures that your shelves are anchored securely and can support heavier loads.

Creating Pilot Holes and Pocket Holes
Drilling pilot holes before inserting screws helps prevent the wood from splitting, ensuring a cleaner, more professional finish. Use a drill bit slightly smaller than the screw diameter to create the pilot holes.
Pocket holes are another useful technique for creating strong joints. These angled holes allow you to screw the boards together from the inside, creating a seamless appearance. Pocket hole jigs are readily available and make this process straightforward.
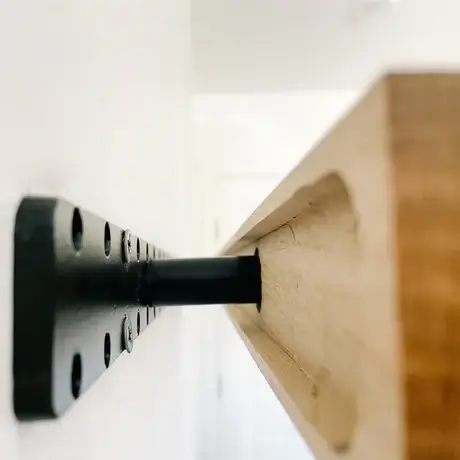
Adding Support with Metal Rods
For added support, consider using metal rods or brackets to reinforce your floating shelves. These can be hidden within the wood, providing extra strength without compromising the sleek, floating appearance.
Metal rods are particularly useful for longer shelves or those that need to support heavy items. By distributing the weight more evenly, they help prevent sagging and ensure your shelves remain sturdy over time.
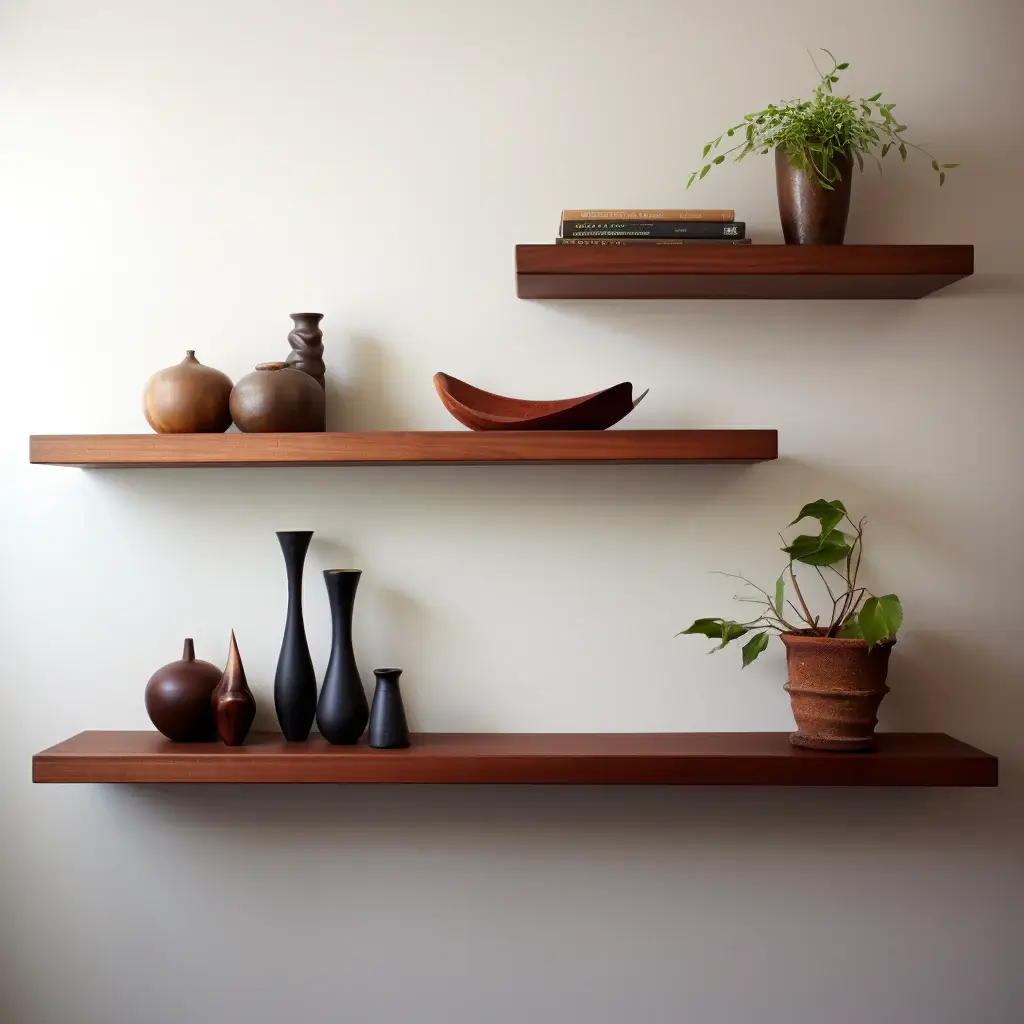
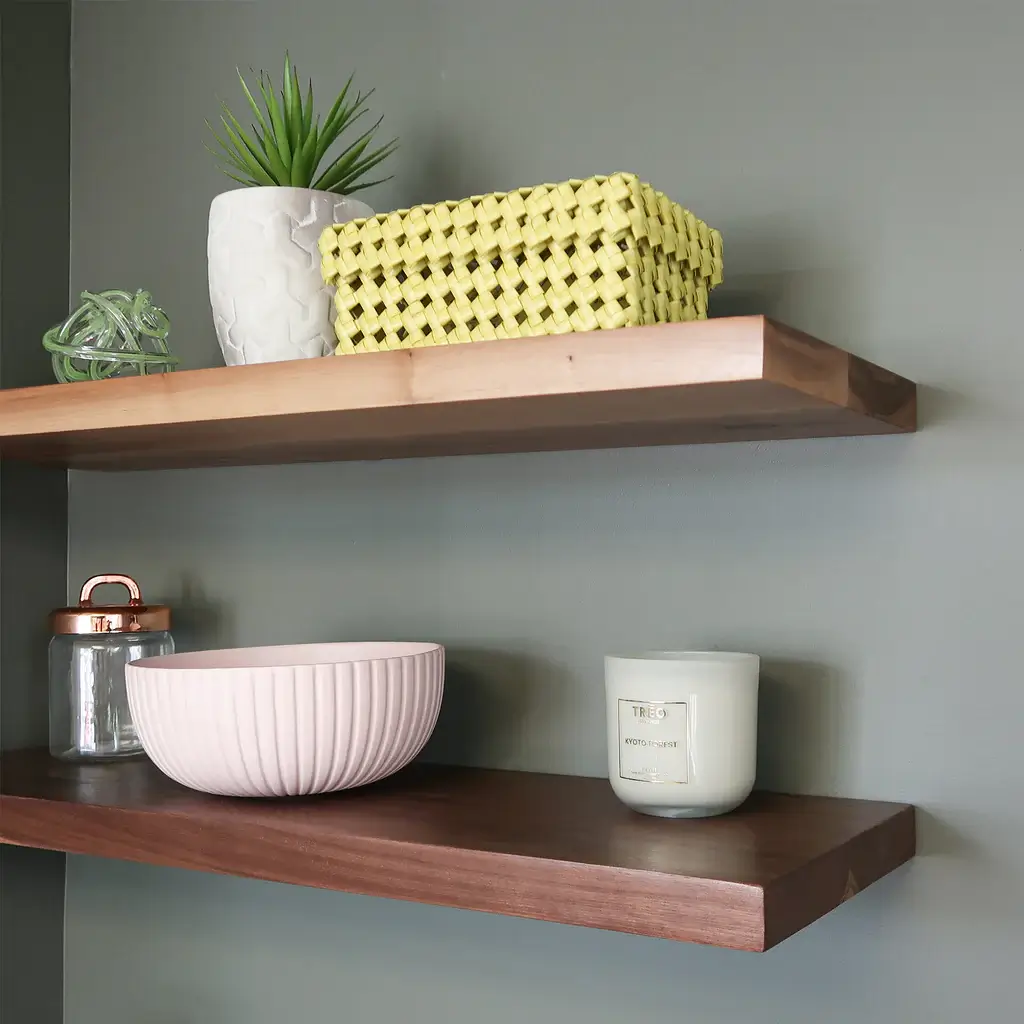
Finishing Touches for a Professional Look
The finishing touches can make or break the appearance of your DIY floating shelves. Proper sanding, staining, and painting are crucial for achieving a polished, professional look that enhances your home's decor.

Sanding for a Smooth Finish
Before applying any finish, sand your shelves with fine-grained sandpaper to create a smooth surface. Start with a coarser grit to remove any rough spots or imperfections, then progress to finer grits for a polished finish.
Sanding not only improves the appearance of your shelves but also helps the stain or paint adhere better, ensuring a more even and long-lasting finish.
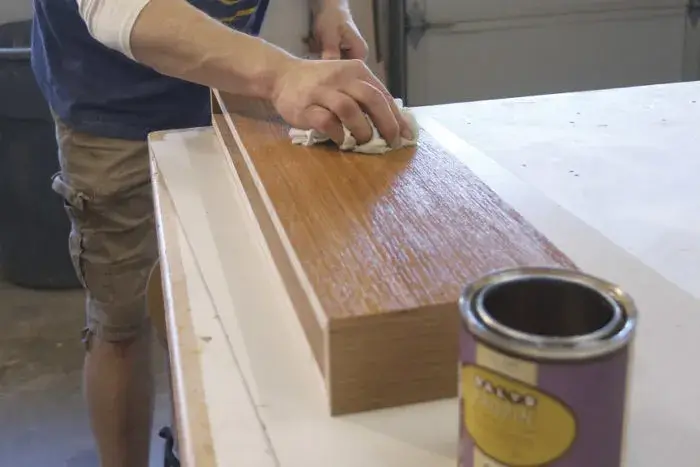
Staining and Painting
Staining your shelves can enhance the natural beauty of the wood grain, adding depth and character to your project. Choose a stain color that complements your decor and apply it evenly with a brush or cloth. Allow the stain to dry completely before applying a clear finish to protect the wood.
If you prefer a painted finish, select a high-quality paint designed for wood surfaces. Apply multiple thin coats, allowing each to dry thoroughly before adding the next. This ensures a smooth, even finish that will stand up to wear and tear.
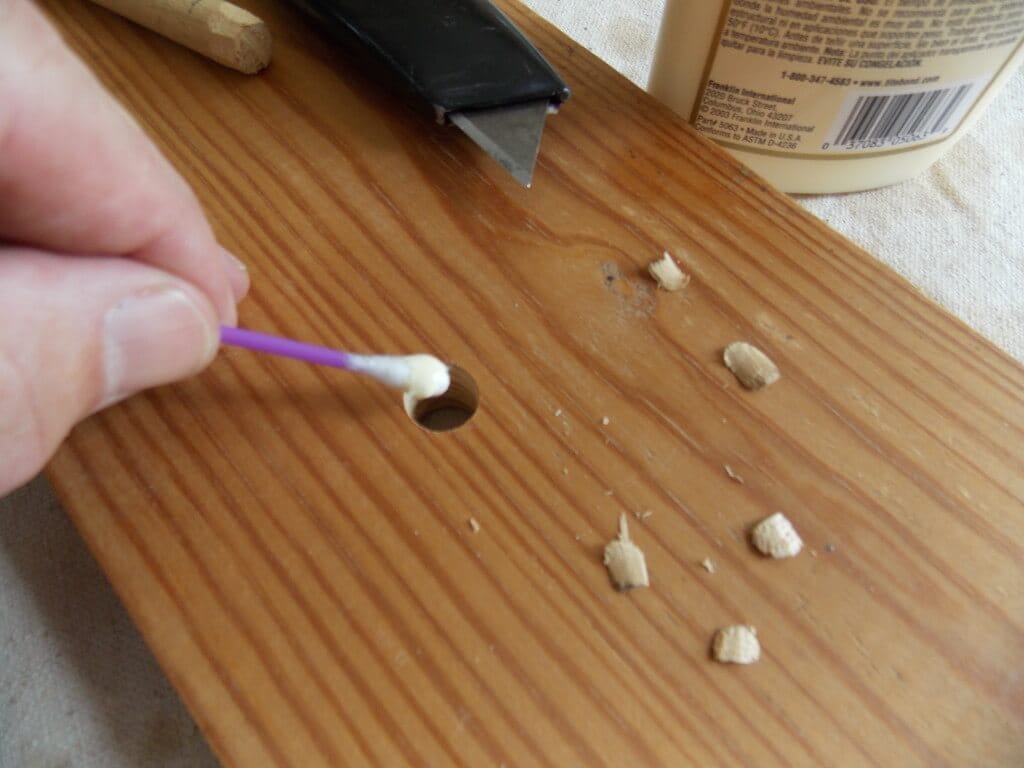
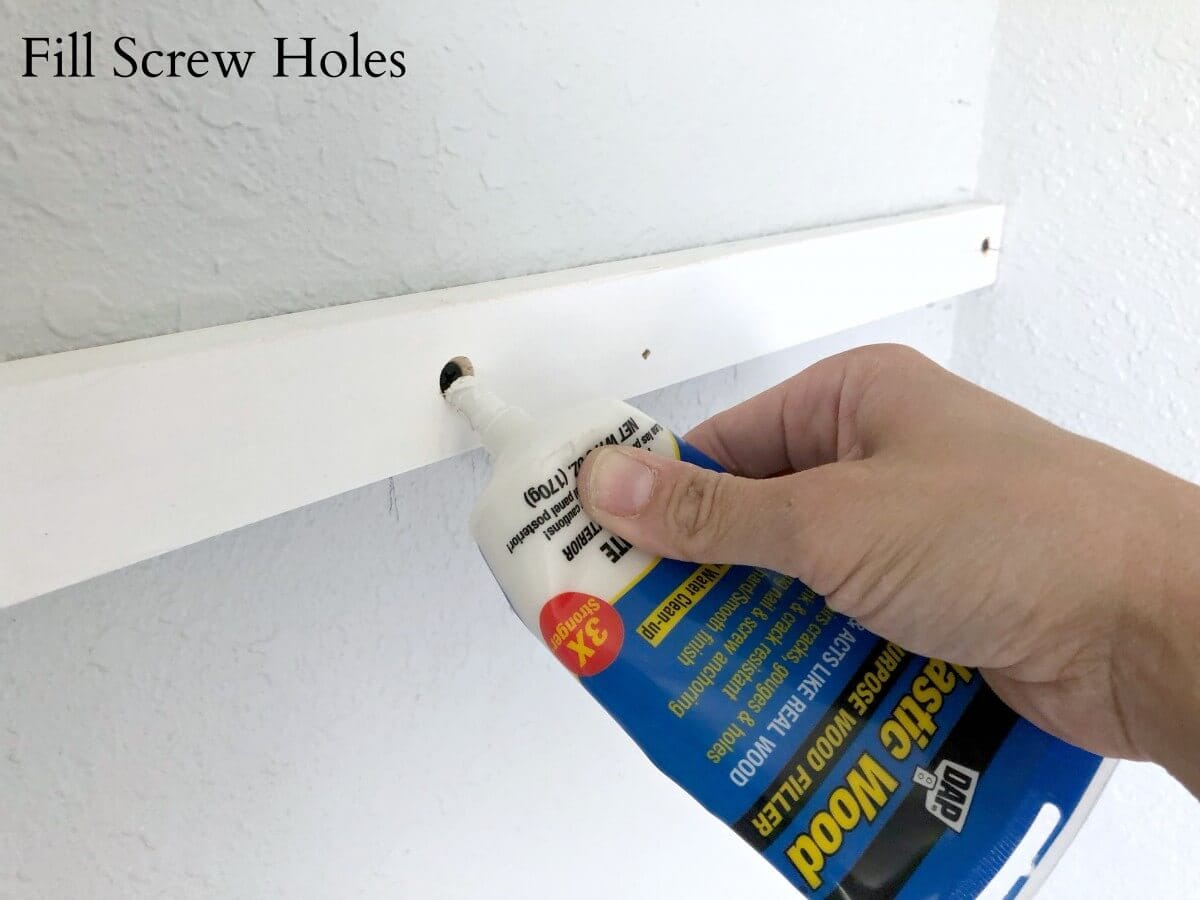
Filling Nail Holes and Screw Holes
For a seamless appearance, fill any nail holes or screw holes with wood filler before sanding and finishing. Choose a filler that matches the color of your wood or can be stained to blend in. Apply the filler with a putty knife, then sand it smooth once it's dry.
Filling these holes not only improves the appearance of your shelves but also helps protect the wood from moisture and damage.
Practical Examples and Case Studies
To illustrate the process of building DIY floating shelves, let's look at a few practical examples and case studies. These real-world projects demonstrate the techniques and materials discussed in this guide, inspiring and insights for your own DIY endeavors.
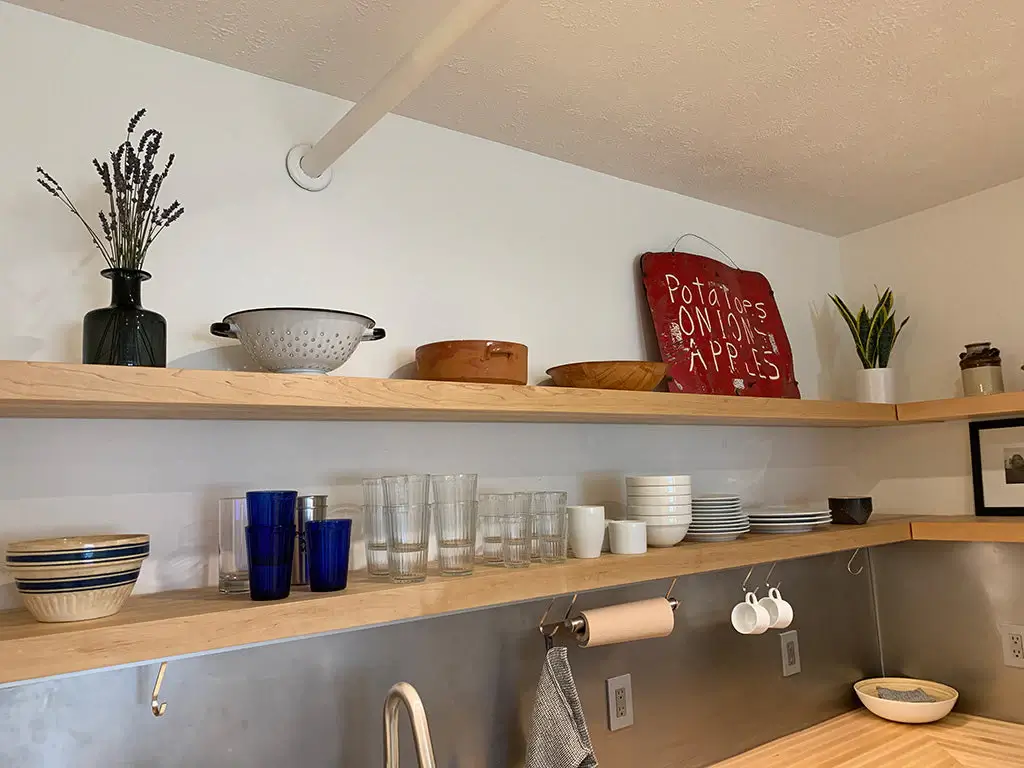
Example 1: Pine Shelves in a New House
In this example, a homeowner used pine to create floating shelves in their new house and discovered there is more to having good wood shelves than just the wood. The pine boards were cut to size, sanded, and stained to match the existing decor. Wood glue and screws were used to assemble the shelves, with metal rods providing additional support.
The finished shelves offered a cost-effective storage solution that blended seamlessly with the home's rustic aesthetic. Despite being a softer wood, the pine shelves were sturdy enough to hold books and decorative items, thanks to the careful construction techniques used.
Example 2: Oak Shelves for a Heavy-Duty Application
A DIY enthusiast needed heavy-duty shelves to store kitchen appliances and cookware. They chose white oak for its durability and resistance to moisture. The oak boards were cut to size, with pilot holes and pocket holes used to create strong joints.
Metal rods were embedded within the shelves to provide extra support, ensuring they could handle the weight of the items stored on them. The oak shelves were finished with a clear coat to highlight the beautiful grain and protect the wood from spills and stains.
Example 3: Walnut Shelves for a Luxurious Look
In this case study, a homeowner wanted to create a statement piece in their living room. They chose walnut for its rich color and elegant grain. The walnut boards were cut to size, sanded, and assembled using wood glue and screws.
The shelves were mounted to the wall using hidden brackets, creating a sleek, floating appearance. The natural beauty of the walnut required minimal finishing, with a clear coat applied to protect the wood and enhance its luxurious appearance.

Summary
Choosing the right wood for your DIY floating shelves is crucial for achieving the desired look and functionality. From cost-effective options like pine to luxurious choices like walnut, each wood type offers unique benefits.
Proper construction techniques, including the use of wood glue, screws, and metal rods, ensure your shelves are sturdy and reliable. Finishing touches like sanding, staining, and painting add the final polish, creating a professional and attractive result.
FAQ
What is the best wood for DIY floating shelves?
The best wood for DIY floating shelves depends on your specific needs and preferences, as well as how much space is required. Pine is a cost-effective option, while oak and maple offer durability and versatility.
Walnut and cherry provide a luxurious appearance, and mahogany is known for its strength and rich color.
How do I ensure my floating shelves are sturdy?
To ensure that you build DIY floating shelves that are sturdy, use wood glue and screws to create strong joints. Drill pilot holes to prevent the wood from splitting, and consider using metal rods or brackets for added support. Mount the shelves to the wall using screws anchored into the studs.
How should I finish my DIY floating shelves?
Finish your DIY floating shelves by sanding them with fine-grit sandpaper for a smooth surface. Apply a stain to enhance the wood grain or paint for a different look.
Fill any nail holes or screw holes with wood filler before sanding and finishing to achieve a seamless appearance.
Click here if you're looking for floating wood shelves!
 Ashton Tucker
 Ashton Tucker
 Ashton Tucker
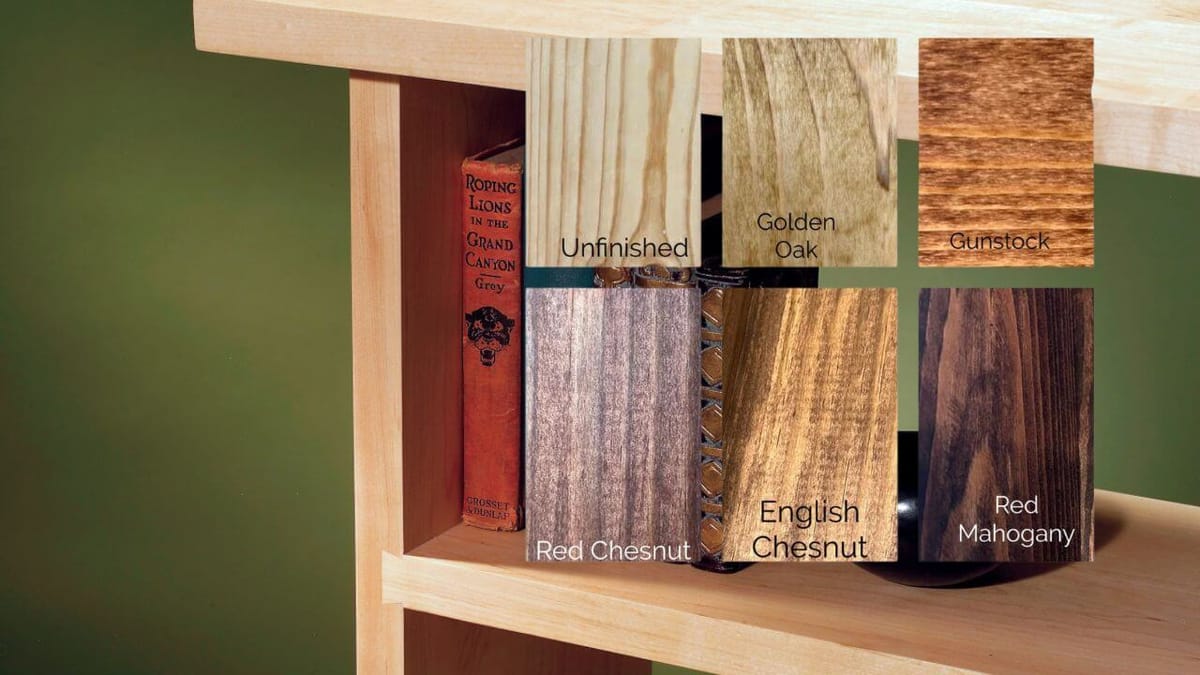 Ashton Tucker